
Manager & Timekeeper Toolkit
Link to this section

Updated for 23-24: Grab & Go Communications
How Do I?
Link to this section
Click below for instructions on basic timesheet management actions in EMPowerSF. For more articles and detailed instructions, refer to the EMPowerSF Time & Attendance Guide or the EMPowerSF Support Center.
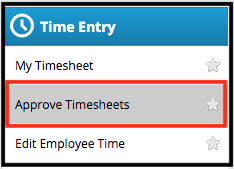
Approve Timesheets
- Go to the "Time Entry" section and select "Approve Timesheets".
- The approve timesheet screen options are:
- View active employees on the current pay period by checking the box, or
- Find employees based on the assignment dropdown, or
- Click "Find" to search by employee ID, name, etc.
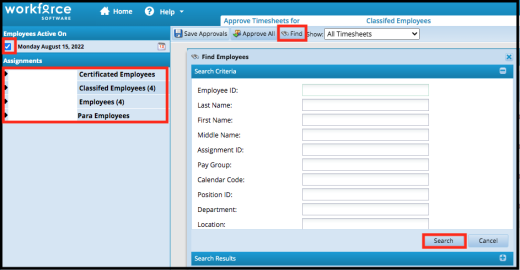
The “Show” field will display a dropdown screen to give you the option to see all time sheets or amended timesheets only.
- Once you have selected the options for viewing, the timesheet will display with the:
- Employee ID
- Regular hours entered: Scheduled hours
- Premium hours entered
- Absence hours: Time taken off
- The total hours: Combined hours entered for the time period inputted
- Severity messages: If these message are not corrected it could interrupt payroll
- If the timesheet has been submitted
- If you want to reject the time click on the white paper with the red minus symbol on it
- If you want to pay out the off cycle check the “pay now” box
- Check the approve box to approve the timesheet. Managers also have the option of mass approving all timesheets by selecting the records for approval and then clicking the APPROVE ALL button.
- Click on the SAVE APPROVALS button.

Reject Timesheets
- Go to the "Time Entry" section and select the option “Approve Timesheets” from the three options
- The timesheet will display the Employee ID, hours, messages, and if the timesheet has been submitted. Only submitted timesheets can be rejected. To reject the timesheet, click on the white paper with a red circle
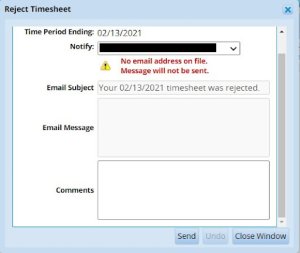
- Once the manager has rejected the timesheet, a pop up box will be displayed with further information to be sent to the employee:
- Time period date
- Who to notify
- Email subject line
- Email message
- Comments
- Please note that if there is not an email address on file for the employee, the message will not be sent
- Click Send.
Approve Overtime
For any overtime worked, Supervisors must select a SACS Code to charge the additional hours to. Before approving overtime, please go to PERCii to view the SACS codes where you have budgeted for overtime.
- There are multiple Object Codes for overtime depending on the employee group being paid. It is important to look for an Overtime Object Code that is in the same series as where the employee’s regular salary is charged.
For example, the regular salary for Clerks is charged to Object Code 2402. Extra hours for clerks who work less than 1.0 FTE are charged to Object Code 2403. Overtime for clerks who work more than 1.0 FTE is charged to Object Code 2404.
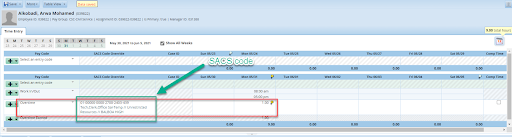
Once you have located a SACS code with the appropriate Object Code, enter that on the timesheet in the SACS Code Override column. You can also search by the name of the Object Code, Resource, or Org of the SACS Code. This SACS Code will be reviewed and approved by the Budget Office to ensure that the right Object Code has been selected, that the Supervisor selected a SACS code in their budget, and there is sufficient budget to pay the Overtime. If any of these need corrections, the Budget Office will contact the Supervisor to either change the SACS Code or submit a Budget Transfer Request.
- Click the Save button to save the SACS code into the employee’s timesheet.
Note: To split-fund overtime, create a new “slice.” In other words, you can split the overtime into two thirty minute slices, each with their own SACS Code.
Approving & Rejecting Time Off Requests
- Managers can approve time off requests by going to the Schedules section and selecting Review Time Off Requests. You may have to expand using the arrow if you don’t see it immediately on the screen.
- The Review Time Off requests page displays with the requested time off visible under the “My Pending Requests” tab. Managers can also view all the time off requests under the “All Requests” tab. The Change Filter icon is used to filter the requests. Select the request to be approved from the list of requests.
- Time Off Review Summary Page will appear. You can do the following:
Approve Request : Approves the Time Off Requests.
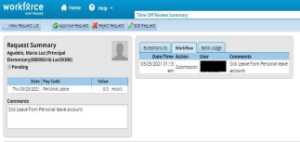
Reject Request : Reject the Request
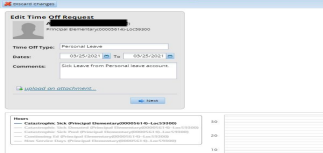
Edit Request: Opens the edit request page to edit the request.
Exceptions: Shows the Exception messages for the request.
Workflow: Shows the Workflow for the request
Bank Usage: Shows the available leave balance of the employee.
Manager Comments: The manager gives the comments for approval and clicks on
- Click Approve Request to approve the request.
- A popup window appears showing the Approval status of the request. Click on OK to close the window.
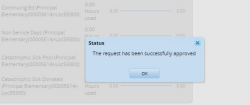
- The approved request can now be seen with “Request Status – Approved” under the “All Requests” tab.
Amend Timesheet
- Confirm Pay Period:
- Before editing employee’s time:
- Confirm that you are on the previous pay period that needs to be amended
- To update the pay period dates, select the “calendar” icon or the “arrows” to change the date
- You can also select the specific day on the work week list view
2. Search for an Employee:
3.Amend Employee Time:
Once the employee timesheet is displayed, use the Amend” button to make changes to the closed timesheet (the Amend button is only active for a closed pay period). There will be a message stating, “ The timesheet was already processed. Press Amend button to make changes.”)

4. Update Time
- Once you click the Amend button, you can edit the closed timesheet. After the changes are made, the Amend button will change to a Save button
- In the timesheet Hours field, update the employee’s time worked
- You can update the pay code, enter comments or delete inputted time as needed

5. Save the entries
6. Other Versions
Once you click the save button, you will have the option to view other versions of the timesheet. You can do this by clicking on the “Other Versions” button
- Open version (the amended timesheet)
- Version #1 (the original timesheet)
- You can compare the amended timesheet to the original.
7. Approve an Amended Timesheet
- Managers can approve the amended timesheet for the pay period by checking the Approve and Save Approvals buttons
- To reject the timesheet, click on the blank paper with the red minus sign on it
- To see the approval history, click on the curled up paper beside the reject button
- Please remember to acknowledge any exception messages, as this can impact EOPP and the employee’s pay

Approve Stipends
Manager enters time & generates Stipend pay codes:
- In Workforce, select Edit Employee Time on the Time Entry panel.
- Click on the “Find” button and search by employee ID or use the arrow dropdowns to find the staff member that is to be paid a stipend. Searching for the staff member or clicking on their name will pull up the employee’s timesheet.
- Before editing time, confirm that the work week is correct by checking the timesheet dates and the pay period dates. To change the pay period dates, select the “calendar” icon or click on the “arrows” to change the date.
- Find the row that matches the date you want to submit time for. Select from the dropdown labeled "Select an entry code" to choose a paycode.
- Select the "Stipend" paycode, and enter the Stipend amount. A SACS string will also need to be entered in by the manager as well. The example below is for certificated staff:
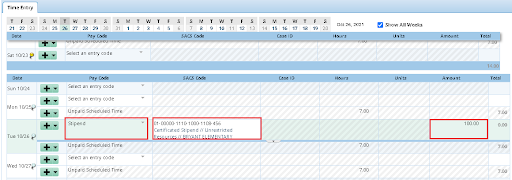
- Click on the Save icon to save the entries . A red box will appear to confirm the changes or updates have been saved.
- Once the entries are saved, the stipend amount will populate in the time entry.
- If a SACS code was not entered in before saving, a warning message or exception message will appear at the bottom of the page requiring the entry of a SACS code. Managers must enter a SACS Code; employees do not need to enter SACS Codes! If you are a manager, jump to the section on how SACS-code related exception messages are resolved.
How do I enter stipends for staff we do not supervise? (i.e. central office to sites)
Delegate Timekeeper Access
TimeKeeper Expectations:
-
Timekeepers will have the ability to run timekeeping reports and enter SACS codes on the manager’s behalf.
-
Timekeepers have full access to view, edit, and amend all employee timesheets.
Note: This role must be delegated by the manager prior to timekeepers having this level of access
Delegating User Authority to Manage Timesheets:
- Within Workforce Time & Attendance, select “Manage Delegations” under the “Settings" panel.
- Under Manage Delegations, you’ll be able to Revoke/View Delegations for Assignment Groups or Delegate Authority. Select Delegate Authority to manage assignment groups.
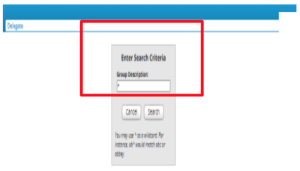
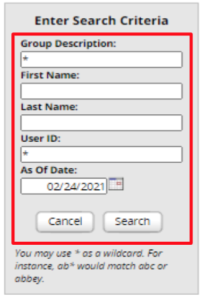
- A search box will appear. Enter an asterisk (*) in the group description to display ALL available groups (employees). Select a specific group from the search results.
- Select the role to delegate. For the purpose of delegating a timekeeper, select Timekeeper.
- Enter effective date (start and end dates) and click on Next.

- Keep the Allow Re-Delegation field unchecked. It allows the selected employee to re-delegate the role (this is NOT recommended unless it’s clear who else can have access to employee timesheets).
- Click Next. Another search box will appear. This time, it is to search for delegation recipients.
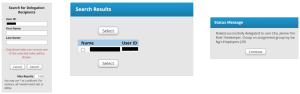
- Enter the Employee ID or Name of the recipient in the Search for Delegation Recipients box and select the person from the results.\
- A pop-up will display confirming delegation of the assignment group to the recipient.
Revoking User Authority:
- Within Workforce Time & Attendance, select “Manage Delegations” under the “Settings" panel.
- Under Manage Delegations, you’ll be able to Revoke/View Delegations for Assignment Groups or Delegate Authority. Select Revoke/View Delegations for Assignment Groups to revoke delegation.
- A search box will appear to allow you to search for the delegation. Again, you can use an asterisk (*) to view all.
- The Search Results will show Assignment Groups that have been delegated and its details. Click on Revoke to revoke the delegation from the delegated user.

- A pop up will display confirmation and the effective date. Managers can select the effective date and click on the Revoke Delegations button to continue to revoke the delegation.

This page was last updated on September 8, 2023