Introduction Link to this section
The Department of Technology appreciates your understanding if some of the content on this page is no longer up-to-date.
What Is BlockSite? Link to this section
 An important part of student Digital Agency involves learning to monitor and manage one's own media use. However, many parents have found that their children still need a little extra support when it comes to avoiding distracting websites. While SFUSD continues to promote the process of students learning to manage their screen time as the preferred scenario, we are making this internet browsing management tool available for SFUSD Chromebooks, as an added optional support, while students develop their self-management skills.
The BlockSite Chrome extension allows parents to set up password-protected internet controls on their student's Chrome browser and/or SFUSD Chromebook. Parents may also set up schedule for BlockSite so that, for example, it only operates during school and homework hours.
The basic version of BlockSite is free and has been made available for all SFUSD Chromebooks. It enables parents to block or allow up to 6 sites. Parents may also choose to purchase the premium version of the tool directly from the vendor, allowing them to block or allow an unlimited number of sites.
Getting Started with the Chrome Extension
Link to this section
What Are the Key Features of BlockSite?
Parents can Use BlockSite to do the following:
-
Block/unblock specific websites
-
Set up a schedule, so that sites are only blocked during school and homework hours
-
Set a password, so that children cannot change settings or delete the tool
-
Override their settings to allow a single viewing of a website, simply by entering their password when prompted.
-
Choose to either allow access to all sites except the ones they specify OR to block all sites except the ones they specifically allow.
Step 0: Know Before You Install
The BlockSite Chrome extension and app are not part of the SFUSD Digital Backpack. While BlockSite's terms of use were found to be acceptable, parents must be aware that they and their children use the tool at their own risk, without the data privacy and liability protections that are ensured by an SFUSD master contract.
This webpage will show you how to bypass the free trial of the paid, premium version and install the always-free, basic version. If you do not follow the installation steps on this page, you will likely choose the temporary trial of the paid version and, after a few days, will be prompted to pay to continue.
Step 1: Install the Chrome Extension
- Open Google Chrome by pressing the Chrome icon, which looks like a color wheel.
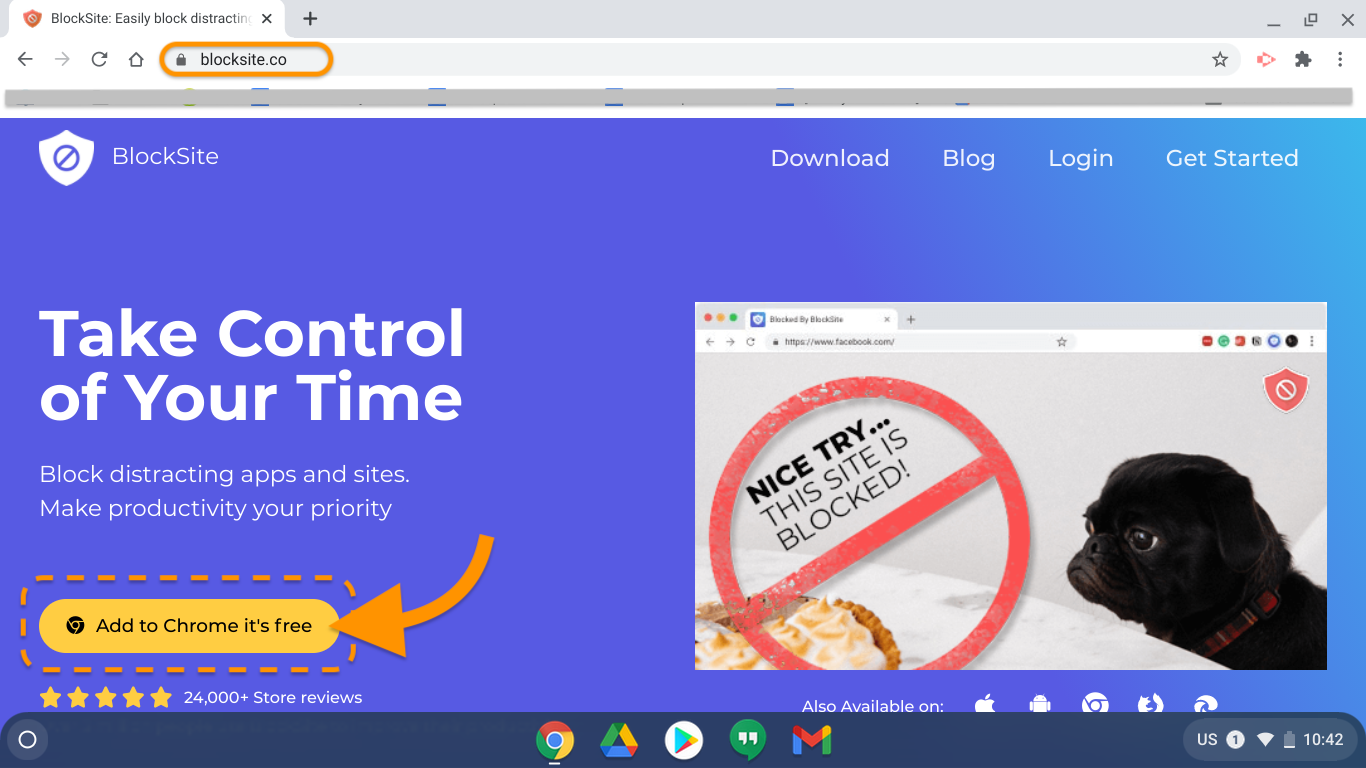
- In the address bar at the top of the Chrome screen, type blocksite.co
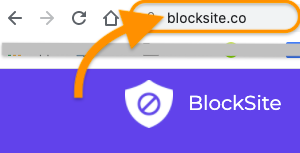
- When the blue, BlockSite page opens, press the button on the screen that says: "Add to Chrome it's free."
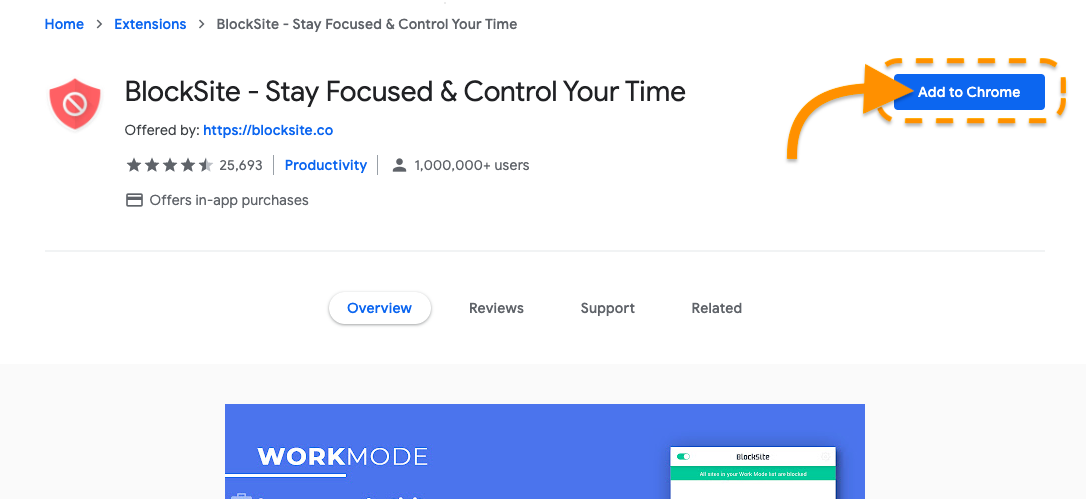
- When the next screen loads, make sure it has the BlockSite logo (orange shield with a circle that has a line through it). Press the blue button that says, "Add to Chrome."
- When this pop-up appears, press "Add extension."
- When the "thank you" pop-up appears, you can click "Maybe Later" for increased privacy regarding what websites your child visits online. (There is a link to the privacy policy, if you wish to read before deciding).
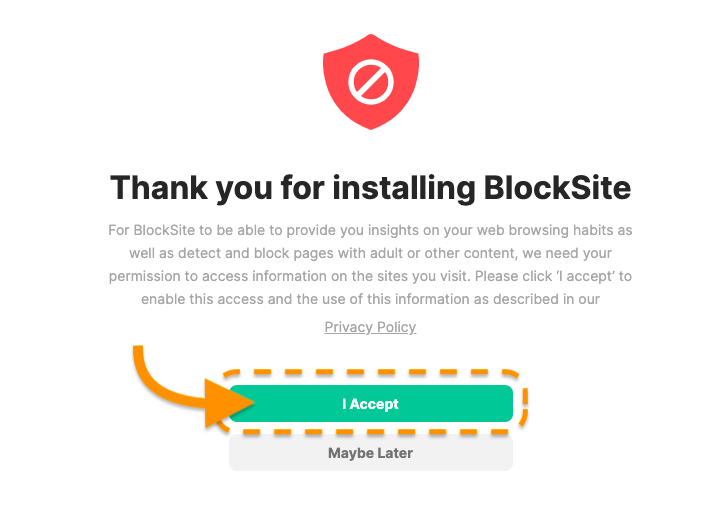
- A pop-up will appear for a 3-day trial of the premium version, with pricing options for purchasing a license. We recommend you press the gray "Skip" button to proceed to the always-free, basic version. You can always upgrade later. The free, basic version allows you to block up to six sites.
Step 2: Set Up Your Blocked Sites
Once you finish Step 1 for your initial setup, a window will open with an arrow pointing to a highlighted box.
![]()
Enter the web address of a site you want to block, and press the green plus sign. Now, when your child visits that blocked site, they will see a screen that looks like this:
![]()
The free, basic plan of BlockSite allows you to add up to six blocked sites.
![]() If you check the box for "white list mode," your child will only be able to visit the sites you list. This is a good option when blocking six sites is not enough. You can allow only the sites the student needs for distance learning, such as Seesaw and Google Docs. All other sites will be blocked. If you child needs to visit a blocked site as part of an assignment, when your child clicks on the link the teacher provided, you will need to enter your password to temporarily unblock the site. (See Step 6 to learn how to set up password protection for BlockSite).
If you check the box for "white list mode," your child will only be able to visit the sites you list. This is a good option when blocking six sites is not enough. You can allow only the sites the student needs for distance learning, such as Seesaw and Google Docs. All other sites will be blocked. If you child needs to visit a blocked site as part of an assignment, when your child clicks on the link the teacher provided, you will need to enter your password to temporarily unblock the site. (See Step 6 to learn how to set up password protection for BlockSite).
Note: We recognize that, while the term "white list" is commonly used in the web filtering industry, the term has extremely racist origins. We have asked the company to choose a non-racist term, such as, "Allow only these sites."
Step 3 (Optional): Set Up a Schedule
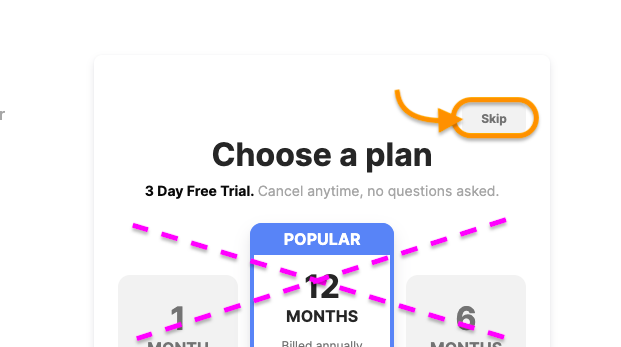
You can choose to block these sites only during certain times of the day by setting up a schedule. Click on the "Schedule" button in the upper right corner.
Set the start and end times for the blocking. The time is in 24-hour time, so for PM times, you want to add 12 to the hour. For instance, 2 pm would be 14:00 (12 + 2) or 4 pm would be 16:00 (12 + 4). You can also give a break where sites are not blocked in the middle of the day by using the interval button to set two or more intervals where sites are blocked. For example, you might set the first interval as 9:00 to 12:30 and then the second interval to 13:00 (1 pm) to 16:00 (4 pm). Next set the days by clicking the days. The sites will be blocked on any days of the week that are green. Click on a day to make it turn gray, meaning that sites will not be blocked on that day. Then click the "Set schedule" button.
![]()
You'll know that the schedule is working if the schedule button now has a green clock on it. If you remove the schedule, the clock on the button will be gray.
![]()
Step 4 (Optional): Set Up a Redirect Page
If you set up a redirect, page, when your child tries to visit a page you've blocked, they will automatically be taken to the redirect page you choose instead.
Click on the "Redirect" button in the top left of the "Blocked Sites" page.
![]()
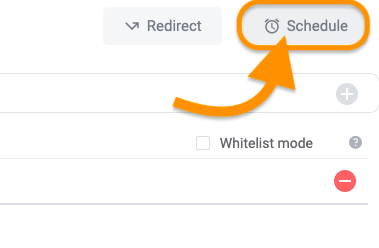
This opens a window where you can type the URL of a website for students to be automatically taken to when they try to visit a page you've blocked. For example, you could have them automatically taken to Google Classroom whenever your student tries to visit a games site you blocked, as pictured below. This can be helpful to remind your student what they are supposed to be working on instead.
Once you click "OK", the redirect button should now be green, showing that feature is turned on. You can click the button again to turn it off and remove the redirect page.
![]()
Step 5 (Optional): Set Up Focus Mode
Focus Mode is ideal for students who need just a little help with managing their own online distractions. When a student or parent initiates Focus Mode, the student begins a distraction-free cycle when sites are blocked for an amount of time the student or parent chooses. After the "focus" time, there is a break for an amount of time the student or parent also chooses, when sites are not blocked. The child or parent can also determine the number of these focus cycles that will occur.
To access Focus Mode, do the following:
- Click the puzzle piece icon at the top-right of Google Chrome.
- When a small popup window appears, click on the word "BlockSite."
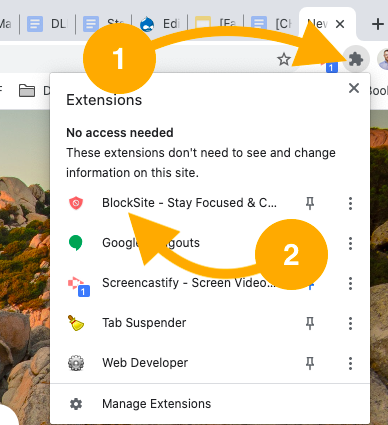
- A new popup will appear. Click on "Focus Mode" at the bottom.
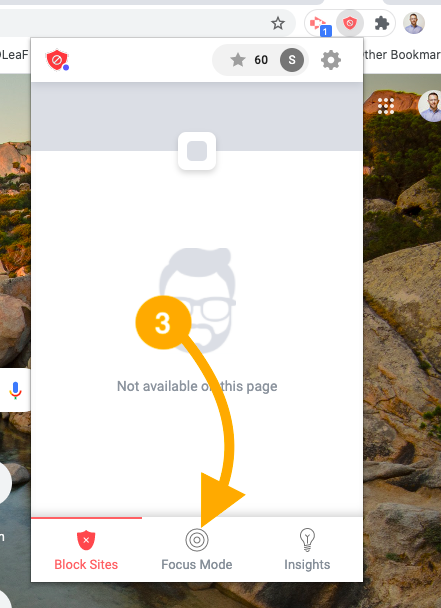
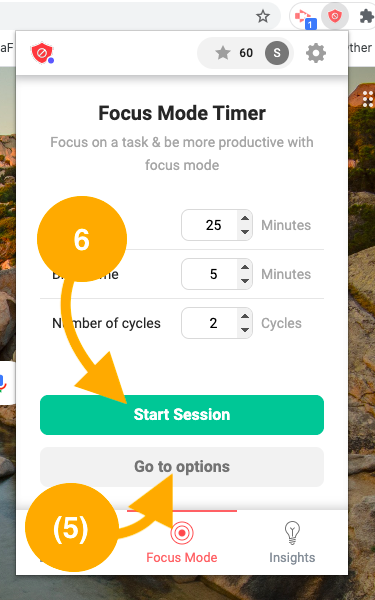
- Set the desired length of the work block ("focus session"), break time, and number of focus cycles.

- First-time Focus Mode users: Click "Go to options" to add the sites you want blocked during Focus Mode. This is a separate list from your blocked sites list (Step 2), so if you want to include all the same sites that you put in your blocked list, you will need to enter them again here.
- Click the green "Start Session" button to begin the Focus Mode session.
Step 6 (Recommended): Set Up Password Protection
Password protection insures that only you, the parent or guardian, can control what sites are blocked. Your child is not able to make changes. If you forget your password, you can have BlockSite email a temporary one to your email address, not your child's. You can use that temporary password to log in, and then change it to one you'll remember. (This feature may not be needed for younger learners). Note: Password protection is only available for the paid/premium version of BlockSite.
Follow these steps to set up a password:
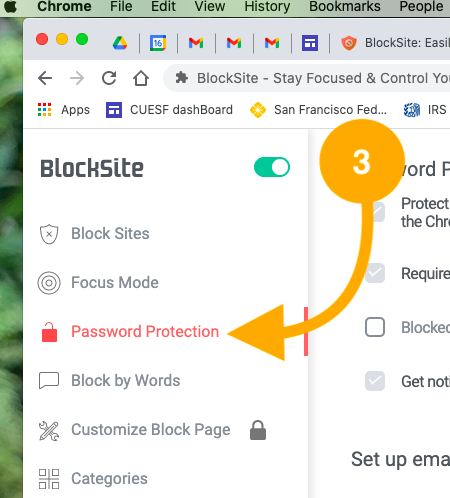
- Go to BlockSite's settings: Click the puzzle piece icon at the top-right of Google Chrome.
- When a small popup window appears, click on the word "BlockSite."
- When the BlockSite settings page opens, click on "Password Protection" on the left side of the page.
- Click on the checkboxes for each password feature you want to activate. We recommend that you check all of them, except for the "Blocked page challenge" feature. (It's not that useful).
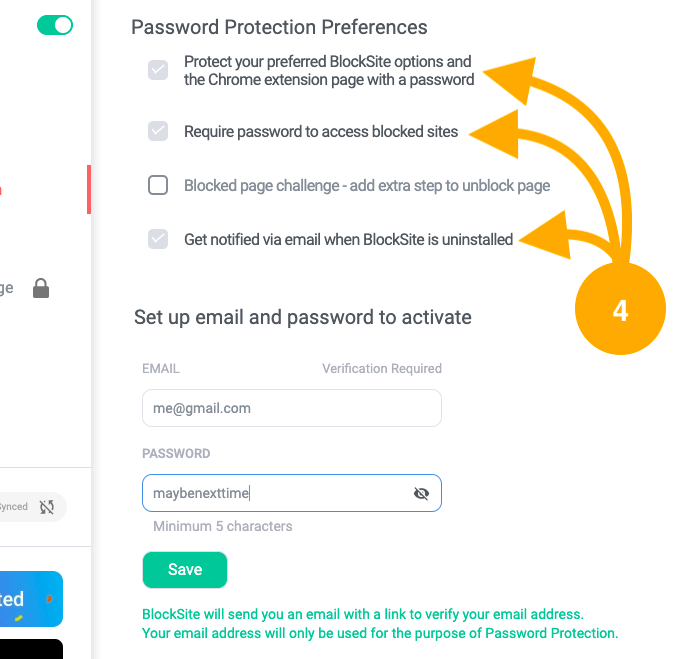
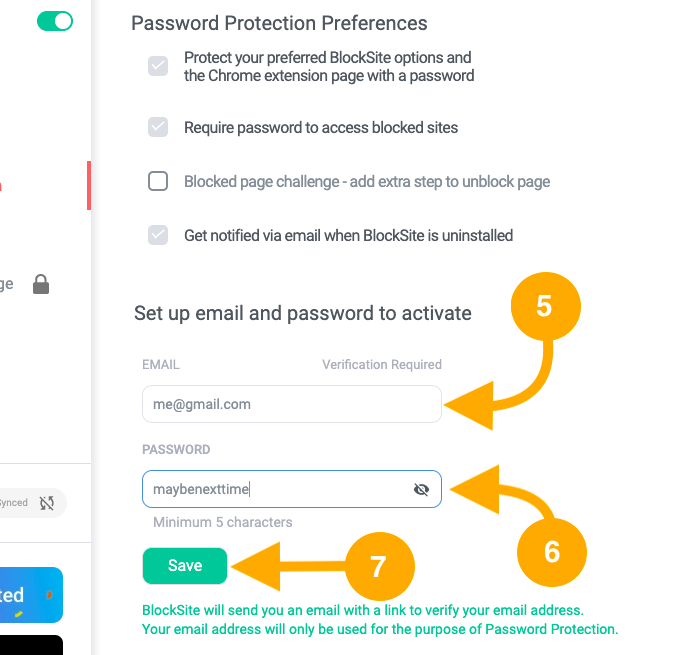
- Enter your email address, as requested.
- Create a password that you will remember but your child won't figure out, such as "maybenexttime" or the name of your elementary school. Passwords are case sensitive and should be written as a single word without spaces. For data privacy, your password should be unique; don't recycle a password that you use with other accounts. Remember to write your password down and store it someplace safe or keep it in your phone.
- Press the green "Save" button.
- The following popup window will appear, telling you to open your email and verify your password.
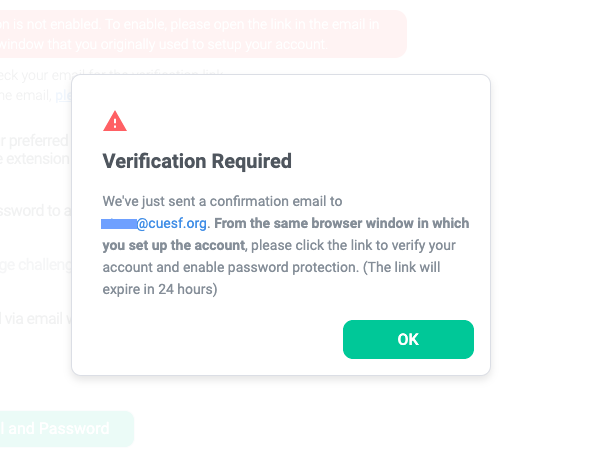 If you can't find the email, it may be in your spam/junk folder. You have 24 hours to open your email and take this step.
 - Your verification email looks like this:
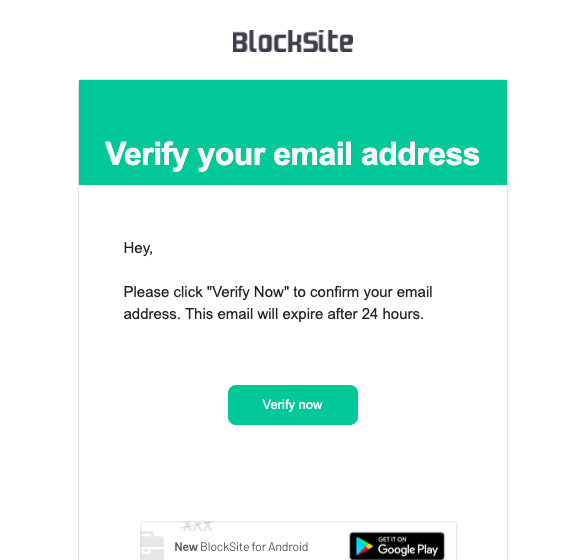 Click the green button that says, "Verify now."
After you complete #9 in your email, the BlockSite Password Protection page will look like this:

From now on, when your child tries to access a blocked site or access BlockSite's settings, a password will be required.
If you forget your password, go to BlockSite's settings (see #1 and #2, above) and click "Forgot password?" 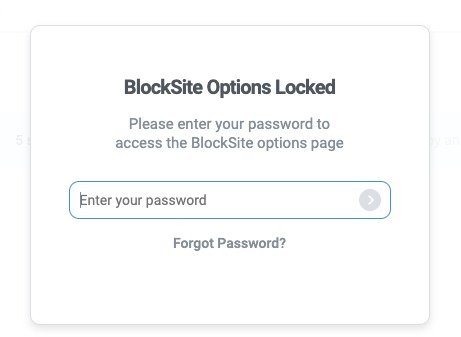 BlockSite will then email you a new password. Use your new password to log in, and then you can change your password back to the original one or to another that you will remember.
Step 7: Try It Out!
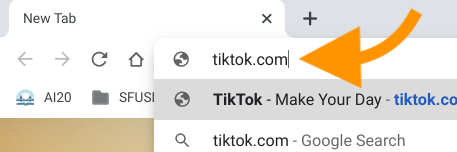
Open a tab in Google Chrome, and enter the URL (internet address) of a site that you blocked. Did the page that loaded tell you the site is blocked?
Note: If you set up password protection, when your child tries to log into a blocked site, a box will appear on the "blocked" screen, allowing you to enter your password. Doing so will allow one-time access to that website. So, for example, if you blocked YouTube, and your child clicks on an assignment that tries to open a YouTube video, you can enter your password in the appropriate box, and the page will load. Remember that after your child has watched the video, the YouTube tab must be closed, or your child can continue to use it to browse YouTube.
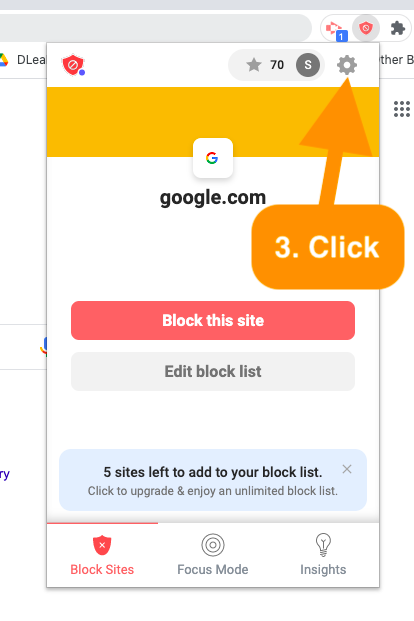
How to Access Your Settings and 'Blocked' List After Your Initial Setup
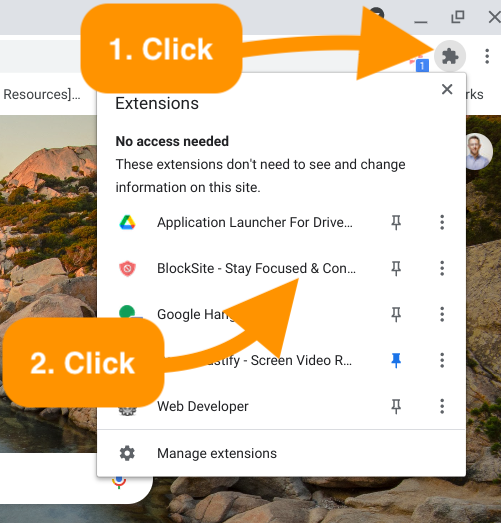
After first set this up, you can always go back and edit your list of blocked websites. Open the BlockSite page by clicking the puzzle piece icon in the top-right corner of Chrome and then clicking on the BlockSite logo.
![]()
Next, choose "Edit block list." If you set up password protection, you'll be asked to enter your password.
![]()
To remove a site from the block list, just click on the red circle to the right of the blocked address.
![]()
To add another site to the list of blocked sites, the steps are the same as when you did the initial setup: click on the box under "Block Sites"; enter the site's web address, and click the green plus symbol across from the web address you just entered. Again, you can enter websites here to be blocked (up to 6 total, for the free version).
![]()
The moment you see the address to the site you just added on the block list, or the moment you remove a site from the list the change is already in effect; you don't need to click a button to save changes. This page doesn't have a "Save" button.
How to Deactivate/Remove the BlockSite Extension
To turn off or remove the BlockSite Chrome extension, click on the puzzle piece icon at the top-right of your Chrome window. Click "Manage Extensions".
![]()
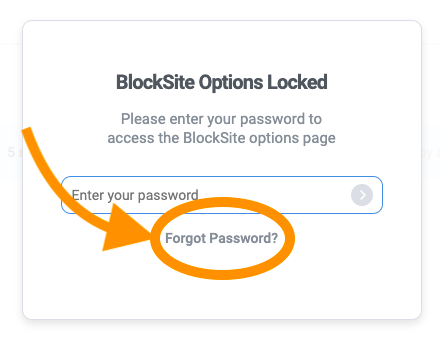
If you have BlockSite set up to be password-protected, type in your password, and press the <return> key.
![]()
If you forgot your password, click "Forgot Password?" and follow the prompts. A temporary password will be sent to the email address you used when you set up your password.
A list of your Chrome extensions will appear. Find the BlockSite one.
![]()
If you want to temporarily turn off BlockSite, click the blue switch to make it turn white/gray. You can turn BlockSite back on by following the above steps to return here and clicking the switch so that it turns blue again. (blue is on, gray/white is off)
![]()
If you want to permanently remove the BlockSite Chrome extension, click the Remove button, and when a popup appears, confirm your choice by clicking the blue button that says "Remove". You can reinstall it later by starting with "Step 1: Install the Chrome Extension" again (above).
![]()
Frequently Asked Questions (FAQs)
Link to this section
What Other Parental Internet Controls Are Available?
If you have your own contract with an internet service provider you may already have internet controls available to you. For example:
iPhones and iPads also have built-in tools for parents, including a filter that limits adult content and a feature that enables parents to restrict web browsing to only a list of allowed sites, which they themselves set up.
How Much Does the Paid, Premium Version Cost?
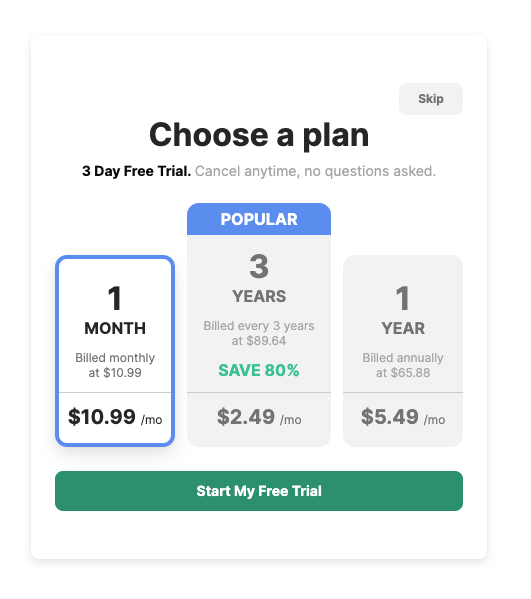
There are 3 pricing plans for BlockSite:
- The monthly plan bills your credit card $10.99 per month.
- The 1 year plan bills your credit card $65.88, once per year ($5.49 per month).
- The 3-year plan bills your credit card $89.64 once every three years ($2.49 per month).
If I Accidentally Choose the Premium Version, How Do I Change to the Always-Free Basic Version?
If you press “Start my free trial” instead of “Skip”...

...you will be prompted to sign in with Google (etc.) or provide your email. 
Note: clicking "Start my free trial" begins your 3-day free trial of the premium version. You get asked for a credit card number in order to continue, and if you do not cancel the premium version within 3 days, your card will be charged.
You can simply close this tab in Chrome and start setting up your blocked sites. See "How to Access Your Settings and 'Blocked' List After Your Initial Setup," above on this webpage, to set up your blocked sites. At this point, you did not yet activate the paid, premium version.
If you continued to log in or even set up an account, you can still close the tab in Chrome and start setting up your blocked sites. You still did not yet activate the paid version.
If you did provide a credit card number and agreed to terms and conditions, you did activate the paid version. But you still 3 days of free trial to follow the steps to cancel BlockSite before you will be charged anything.
See “How Do I Cancel the Premium Version?” on this webpage, below, if you provided a credit card number and want to return to using the free, limited version.
How Do I Cancel the Premium Version?
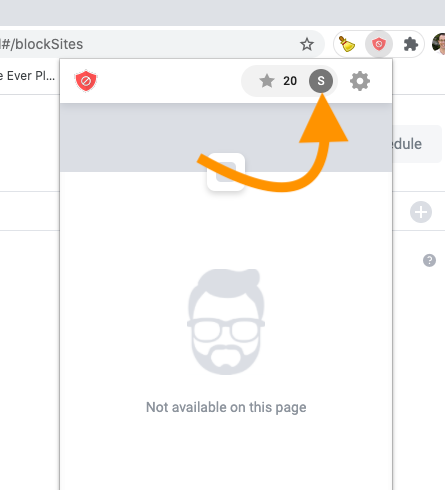
If you signed up for the paid, Premium Version of BlockSite, you can cancel at any time. To access your account in order to cancel, open the BlockSite Chrome Extension popup:

Then, click on the letter with the circle around it. (This letter is the first letter of whatever name you gave when setting up your account, when you were asked, “What shall we call you?”)
Your account page will open. Click “Check plan status” at the top-right of the screen. 
Under “Billing” (top-right), click “Cancel Plan”. 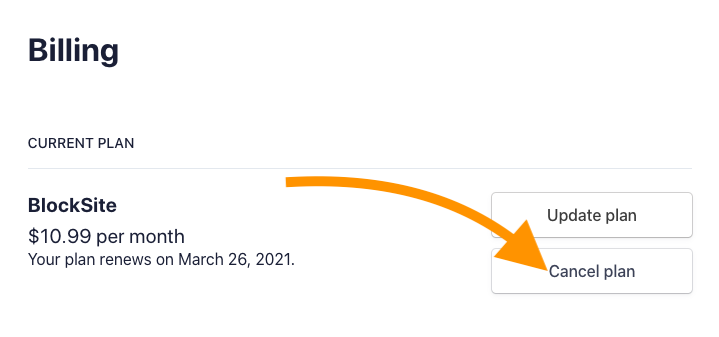
When the next screen loads, click “Cancel Plan” again. 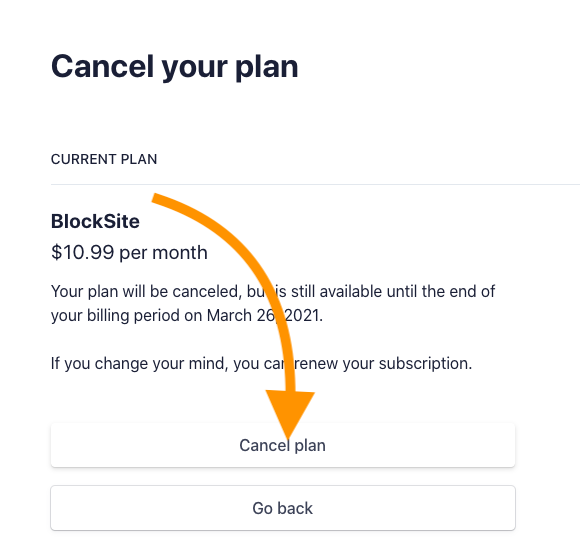
From now on, when you follow the steps to “Check plan status,” under “Billing,” you will see a button that says “Renew plan”: 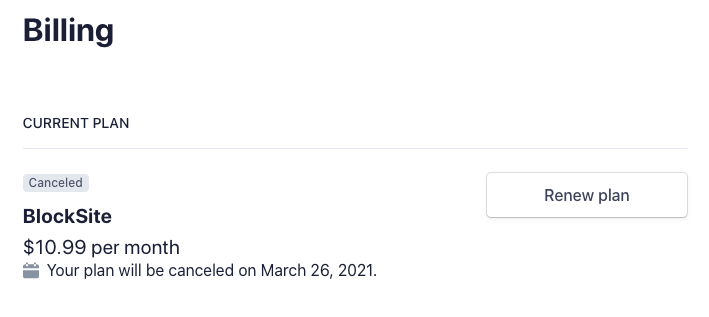
Your Premium plan is now cancelled, and you will be using the limited, free version of BlockSite. You may now close the tab for the “Billing” screen.
What if I Lose / Forget My BlockSite Password?
If you lose or forget your password, BlockSite will send a new one to the email address you provided when you set your password up. You can then change that password to anything you want.
To get a new password, either...
1) enter into Chrome’s internet address bar the URL (internet address) of a site you know is blocked, so you'll be asked for your password;
2) or go to your BlockSite settings in Chrome
When prompted to enter a password, click “Forgot password?”
Check “I am not a robot,” and follow the prompts. 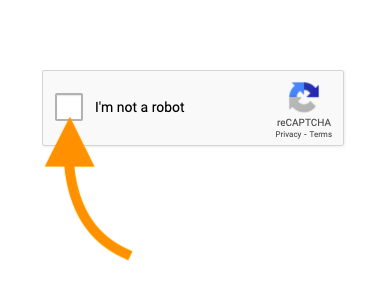
You will receive a message that your new password was emailed to you:
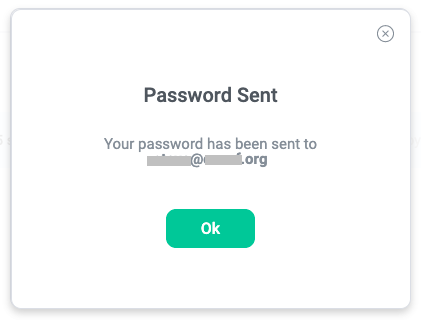
When you open the email, you will see your new password.
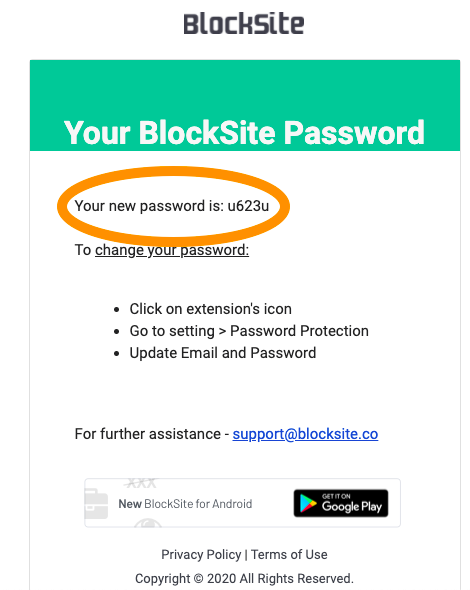
You can change the new password to one you prefer. See Step 6 on this webpage.
This page was last updated on November 17, 2025