"Classic" Google Sites to be removed Link to this section
Is my website a "Classic" Google Site or a regular Google Site? Link to this section
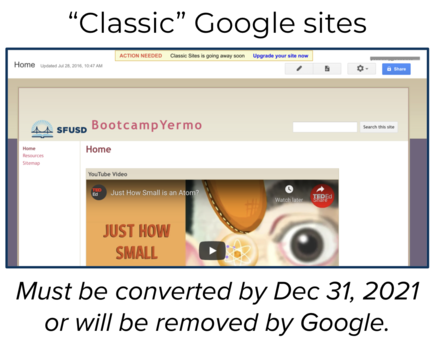
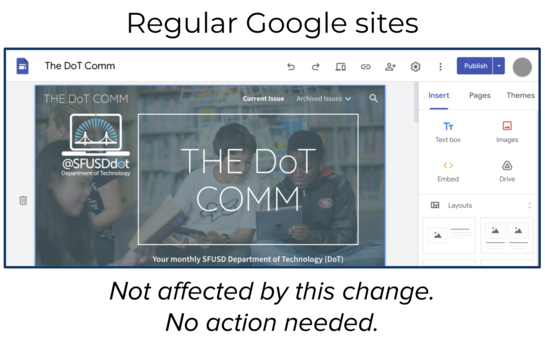
Google introduced a new version of Sites in 2017, so if you created your Google Site after 2017, it's most likely a regular Google Site, which means it will not be affected by this change.
"Classic" Google Sites also look very different from regular Google Sites.


Frequently Asked Questions (FAQs)
Link to this section
What if I don't want this website anymore?
Don't want it? Delete it!
If you don't do anything with your old Site, Google will download it as an HTML file into your SFUSD Google Drive, which might take up a lot of storage space. If you don't want your "Classic" Google Site anymore, we recommend deleting the site so that it doesn't take up space in your SFUSD Google Drive.
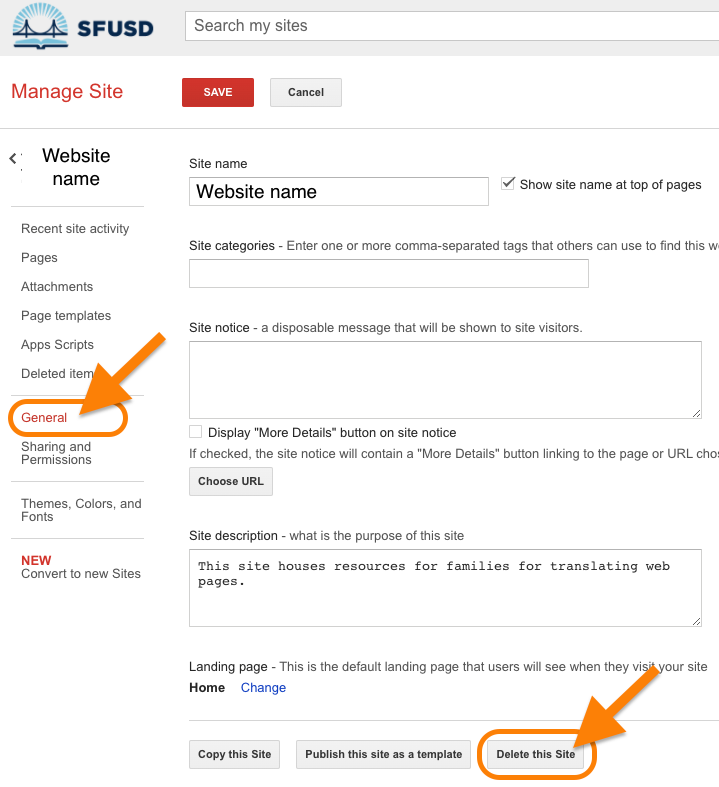
To delete a "Classic" Google Site:
- On a computer, open the site from the "Classic" Google Sites homepage.
- Click Settings
Manage Site.
- Click General
Delete this site.
- To confirm that you want to delete the site, click Delete.

If you need help with these steps, please submit a Help Desk ticket.
How do I keep my site?
To keep your "Classic" Google Site, you'll need to upgrade it to a regular Google Site. At the top of your "Classic" Google Site, you'll see a yellow banner with an "Upgrade your site now" button.
This will walk you through three steps.
Step 1: Start the conversion
We recommend leaving the box checked to "Share with the same people". Then click "Start".
![]()
Step 2: Draft creation
Google will create a draft of the upgraded site. This step shows a progress bar, and once it's reached 100%, click "Continue". The new site won't be visible at anyone until you're ready to publish it, later on in step 4.
![]()
Step 3: Review & publish
It's usually best to keep your old site and your new, upgraded site linked together so that Google knows it's the same website, just upgraded. This also lets you reuse the old site's URL for the new site, which means any existing links to you old site will automatically point to the new site. Click "Review draft" to finish the upgrade and create your new site.
![]()
Step 4: Publish your new, upgraded site
A new tab will open with your new site. You might see a pop-up that offers a tour of Google Sites, which may be helpful if you're not familiar with the upgraded interface.
You can edit your upgraded site and make any changes you'd like, but you'll need to click the "Publish" button in the top right corner to make the site visible to others. Each time you make changes on your new site, you'll need to click the "Publish" button again to make the changes visible to others.
![]()
Step 5: Set the upgraded site's URL
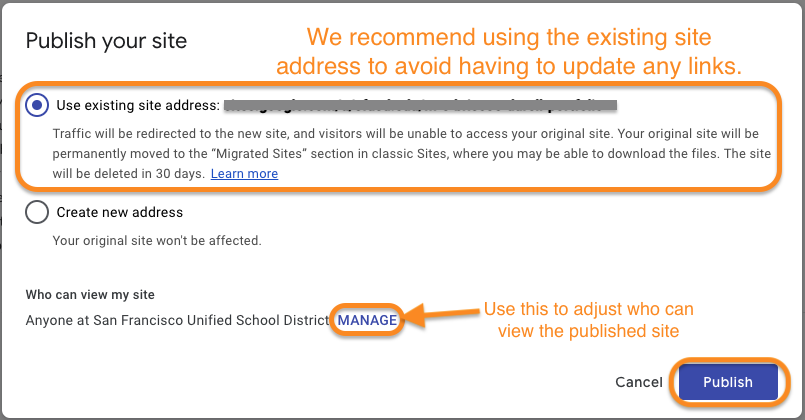
This is the final step to getting your "Classic" site converted to a regular Google Site. We recommend using the existing site address so that you don't have to update any links. The old site will be removed by Google in late Dec 2021 or early Jan 2022, so there isn't much benefit to creating a new URL for your new site unless you want to.
It's also a good idea to check on who can see or edit the site before clicking the "Publish" button.

This page was last updated on November 1, 2021

